I’ve written and posted nearly 300 posts since I launched my blog in May of 2010! Probably the most-asked question with regards to my blog is “How do you come up with things to write about?” Definitely a valid question. Today, I hope to answer it as well as dive deeper into the overall process of writing and publishing a blog post from start to finish.

Step 1 | Be Open To Inspiration
Though this step may seem a little abstract and out-there, it is absolutely critical. I come up with post ideas in the most random, mundane moments of my day. I’ll be walking through the grocery store and think, “I should blog about how I meal plan.” Or, I’ll be wiping down the kitchen after breakfast and think, “It would be fun to write about my morning routine.” Sometimes, a post idea will come to me as a result of a good conversation. Sometimes, a song, podcast, movie, or TV show will spark my creativity. Sometimes, I’ll see another blogger write about something and decide that I’d like to share my take on the same thing. At the end of the day, my post ideas are driven by my life!
Step 2 | Capture Post Ideas
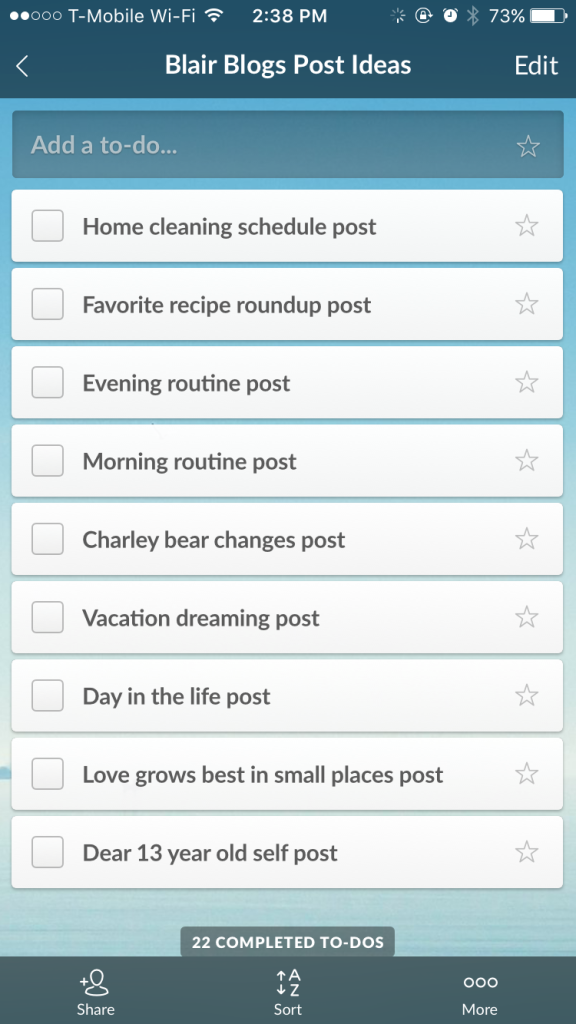
Once a post idea comes into my head, I immediately write it down using Wunderlist (which I can access on my phone as an app or computer as a website). Sidenote: Riley and I have a synced Wunderlist account and use different lists for everything from groceries we need to buy to checks we need to deposit to friends we need to call. It’s awesome…but that’s for another post! 😉
Here’s what my “Blair Blogs Post Ideas” list looks like right now:

As you can see, these are not detailed post ideas–just general ones. I usually just write down a few key words to jog my memory so that I remember what my idea was when I sit down to write. I usually end up writing each post that I put on my list, but sometimes, I’ll merge two ideas or get rid of one altogether.
Step 3 | Brainstorm and Gather Photos
Two key components of a great blog post are, in my opinion, thoughtful writing and good photos. In order to achieve this, I spend time marinating on my post ideas and thinking through how to best express them and write them. Sometimes this means creating a rough post outline, while other times it means hours of online research…and then there are the times where there’s no prep necessary and I’m ready to write right away!
As far as adding images, I will also take photos at this stage or gather them (if they’re already on my phone/camera) and upload them before I begin to write. Blog posts without images can be a little uninteresting, so I always try to include at least a few. (Usually, the more the merrier!)
Step 4 | Sit Down & Write
Perhaps my favorite step in the blog posting process, and the reason why I am a blogger, is this step: writing. I just love to write!
And since, by this point, I have an idea, I’ve done the necessary research, I’ve thought through my post, and I’ve gathered all the photos that I’ll include, all I have to do is write.
Though the process is relatively simple by this point, a blog post still takes me an average of 3-4 hours to write. I rarely finish writing a post in less than two hours, and it’s not at all unusual for me to spend five or six hours on a single post. Part of this is my writing style (detailed, thorough, honest), but I’d be willing to bet that even bloggers who are more big-picture still spend hours upon hours writing.
Step 5 | Add Photos To Post
Once I’m finished writing (and occasionally while I write), I’ll insert photos into my blog post intermittently. For posts where the photos need to be chronological (like a recipe), I insert them in a particular order. For posts where the photos are supporting the writing, but not demonstrating it, I will insert a photo every few paragraphs for some visual interest.
Step 6 | Read & Edit
Once my post is all-but-complete, I read through it a few times and look for any wonky sentences or incorrect punctuation, in addition to adding headings and sub-headings if necessary. I also double check that my photos are rightside-up and clear (and large!). This step can be quick (20-30 minutes) or it can take another hour or more, depending on the length and depth of the post.
(Though I sometimes publish posts with misspelled words or rogue punctuation, I take extra care in editing thoroughly. Nothing turns me off to a blog faster than poor writing!)
Step 7 | Schedule Post
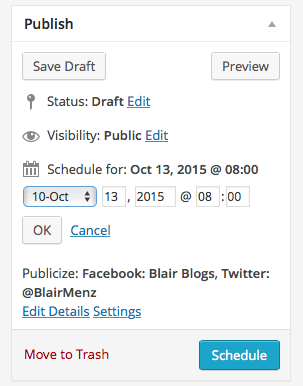
I [almost] always publish blog posts at 8:00am CST, Monday-Friday. (I may change my posting schedule to Sunday-Thursday; TBD!) I write on WordPress, so I have the option to schedule my post for the following day, week, or month. My goal is to be a couple of days ahead at all times, but I’m still just one day ahead at present. (It’s Monday afternoon as I write this; this post will go live on Tuesday morning.)
If you use WordPress, you too can schedule your posts using the “Publish” box in the upper right-hand corner of your “Add a New Post” page. Note that you have to use 24 hour (or “military”) time to schedule a post in the afternoon; for example, if you want a post to go live at 1:00pm, you should enter 13:00.)

Step 8 | Create Social Media Image For Post
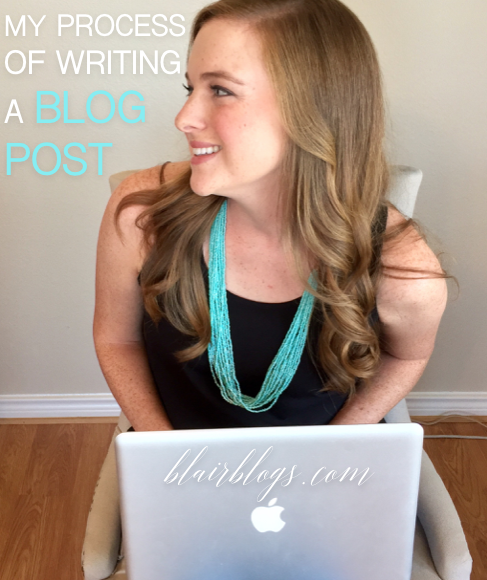
This isn’t required for every blog post, but for any post that would make sense to put on Pinterest, I create a “hero image,” which is simply an image with the blog post title on it. Here’s the hero image for this post:

Some bloggers spend a great deal of time fine-tuning these images to be perfect and gorgeous–but I don’t! I just make sure that it’s a vertical image (for Pinterest purposes) and that it has the blog post title clearly written as well as my blog’s URL. (People will click on it if they’re interested in the post anyway, even if it’s not perfect!)
Step 9 | Publish and Broadcast
If, for whatever reason, I didn’t schedule my post to automatically go live, this is when I would click “Publish.” Most days, as I mentioned above, my post goes live at 8:00am while I’m still eating breakfast with my husband! After he leaves for work, I log onto my computer and broadcast my day’s post. This usually means a mention on Instagram as well as a brief tweet and a link on my blog’s Facebook page. If my post is pin-able, I will also pin it to my “Blair Blogs” board on Pinterest.
Step 10 | Re-Read and Respond to Comments
It’s the funniest thing, even if I spend an hour editing my post before it’s published, I almost always find an error or two after it’s published. There’s something about the post being live that makes me a better editor, I guess! 🙂 Because of this weird phenomenon, I always re-read my post once it’s live and broadcasted (and edit it if need be), and then respond to comments on Instagram, Facebook, Pinterest, or here on my blog itself. (Usually responding to comments begins a few hours after the post has been live.)
…then, I start on the next post! If you’re a blogger and you have a different posting process, I’d love to hear it!
Hello Blair! I really enjoyed this post. Very detailed and interesting as always. I’m very interested in how you use Wundelist with you husband. I use that app as well (love it) and I never though how great it will be to have my lists shared with my boyfriend. Looking forward to that post 🙂
Have a great day!
Thanks for reading!! 🙂 I’ll definitely have to post how we use Wunderlist as a team!
xo,
b
I enjoyed reading your post today. Do you have a fixed size that works best for your “hero image” on Pinterest? Would you mind sharing what that is? I admit I’m not good at sharing my posts on Pinterest and yet I know it’s popular. I think I just don’t allow time for that extra step. Thanks so much!